Because of the size of DBA games, and that you can more easily build armies in historical pairs, it is relatively straightforward to link several battles together to form a linear or narrative campaign. Over the last couple of weeks, as time has allowed, my son and I traced the campaigns of Pyrrhus of Epirus in Italy and Sicily using his and my own armies.
As way of a refresher Pyrrhus entered Southern Italy in 280 BC with an Epeirot army to support Tarentum against the growing power of Rome. Pyrrhus then fought the battles of Heraclea (280 BC) and Asculum (279 BC) where he secured a very costly victory. By 277 BC Pyrrhus had quit Italy and was campaigning in Sicily where he hoped to carve out a new kingdom. But as the campaign against the Carthaginians stalled he departed for Italy once again. Then in 275 BC Pyrrhus faced the Romans at Beneventum, but was defeated in battle. Unable to overcome Rome he finally departed to continue his wars elsewhere.
For our purposes we decided on five battles with the first two or three against the Romans. These would decide the conquest of Italy. If the first two were defeats, or costly victories for the Epeirots, Pyrrhus would move to Sicily for two more battles before returning to Italy for a final battle. If however the first two battles against the Romans were victories Pyrrhus would fight a third battle against the Romans potentially securing his Italian conquests before moving to Sicily.
The army of Pyrrhus would be represented by the standard DBA list (II/28b). Pyrrhus would select a smaller phalanx and supplement his army with Italiot and Sicilian hoplites. While not perfectly historic the Romans would be represented by the Polybian list (II/33) in all three battles, this would at least allow Joel to use his own Romans which would of course fight with great determination. The Carthaginians would be represented by the Early Carthaginian list (I/61b) and in both battles the Carthaginian player selected to field heavy chariots, though less chariots and more cavalry may have been more realistic.
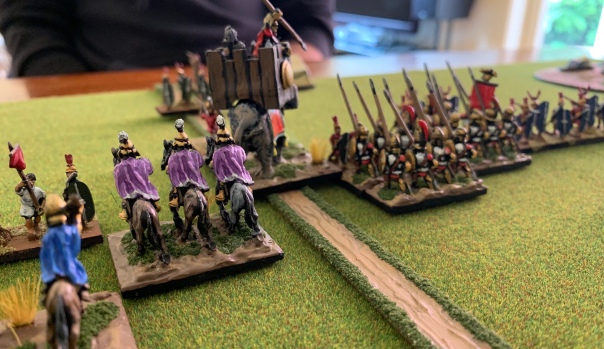
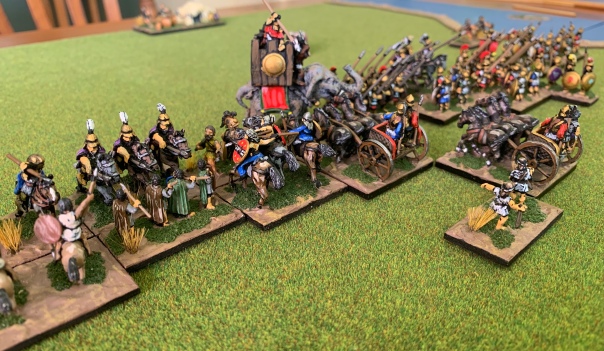
In the first battle in 280 BC near Heraclea Pyrrhus deployed his army with a strong centre and his elephants on the immediate left of the phalanx and his left extended further by a significant portion of his mounted. While Pyrrhus and his companions formed on the right he ordered a swift attack on the left in an attempt to destroy the Roman right before it was fully deployed. Unfortunately before the Epeirot line engaged the Roman right the Romans had completed their deployment and fought back with great determination. The resulting battle hung in the balance for some time. However, despite heavy Epeirot casualties the Roman army eventually collapsed and Pyrrhus secured a narrow victory.
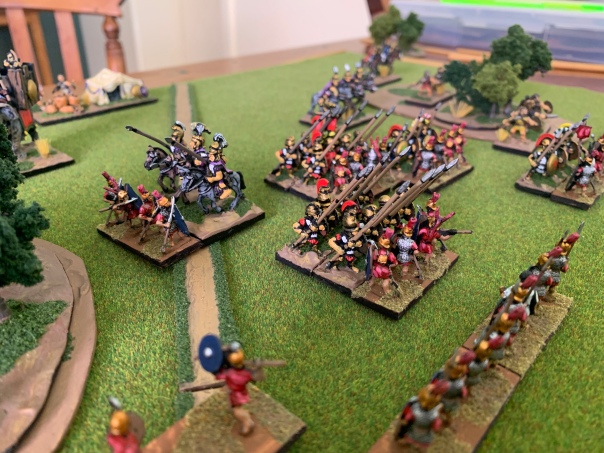
Below, the Epeirot left and centre advance on the Romans. The Epeirot cavalry have just achieved a breakthrough and will soon exploit the situation.
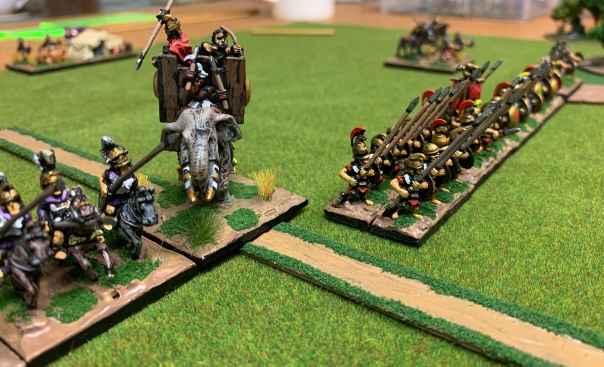
In the second battle of the campaign, at Asculum in 279 BC Pyrrhus deployed with his companions and elephants in the centre flanked by phalangites while the rest of his army extended both flanks. He now aimed to simply cut his way through the Roman centre with the combination of Epeirot phalangites, pachyderms and Epeirot heavy cavalry. The Romans, having selected the battlefield countered with heavy reserves in the centre. In this battle however the Romans were unable to stop Pyrrhus. As dusk settled the Romans had suffered complete collapse of their army and as those few survivors fled north Rome was overtaken by panic. Pyrrhus now marched on Rome his conquest almost complete.
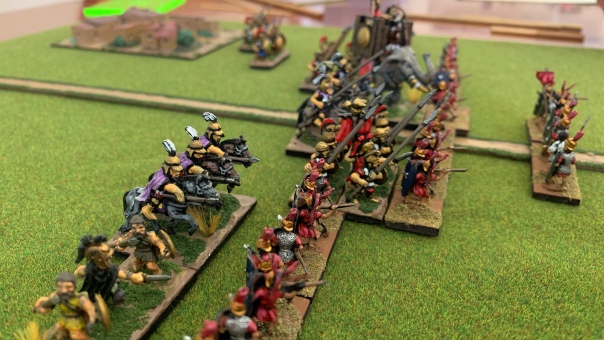
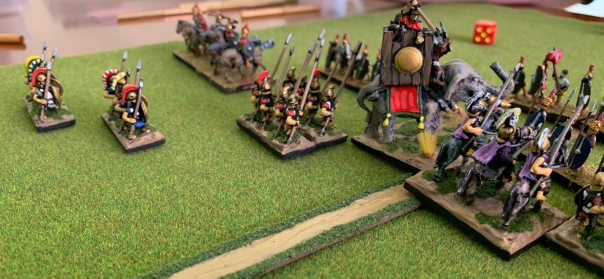
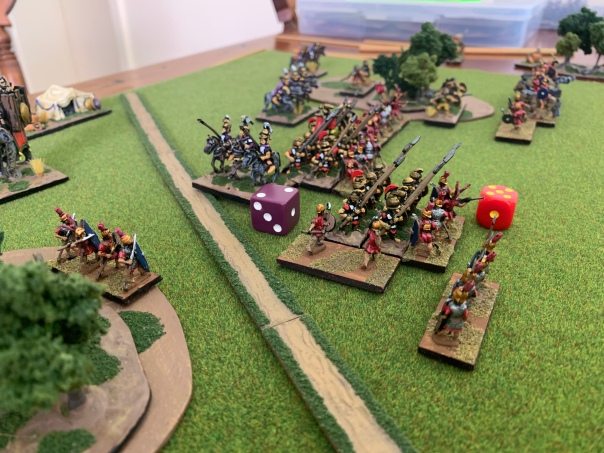
Above and below the forces at Asculum. Above the phalanx is seen advancing with Pyrrhus in support while below the refused Epeirot left wing with Italiot hoplites protecting a portion of the phalanx.
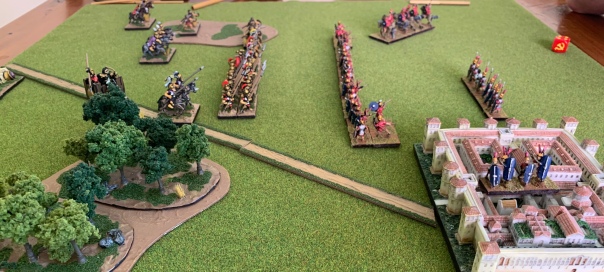
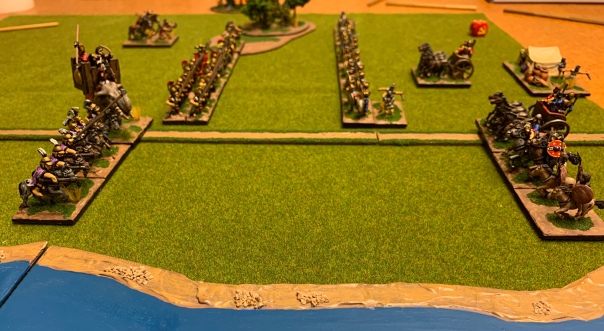
Rome was now galvanised into action and assembled another army and offered battle in 278 BC. Again Rome selected the battlefield and a now desperate and frustrated consul determined to offer battle near Fregellae, resting his left flank on the walled town. Constrained by woods on his left and right Pyrrhus struggled to fully deploy, especially on his right. Below, the general situation with Fregellae on the right.
Undeterred Pyrrhus advanced and progressively attempted to expand his right. It was against the Epeirot right that the weight of the Roman attack came and soon Pyrrhus himself was in the thick of the fighting. His first attack was to drive off the Roman infantry attempting to envelop the Epeirot phalanx, seen below.
Unfortunately Pyrrhus’ luck was not to hold. The first disaster was the loss of a portion of his phalanx engaged from the front and enveloped from the flank.
Pyrrhus now attempted to stabilise the situation and led his heavy cavalry in another charge. Unfortunately the attack was beaten back and worse Pyrrhus was wounded. The combination was too much and the Epeirot army retired from the field defeated. Above and below, the defining moments of the battle.

Clearly the casualties were becoming too great and in the late 278 BC Pyrrhus, having recovered from his wounds, departed for Sicily. As in Italy his arrival in was warmly received by his allies, and with concern by his enemies.
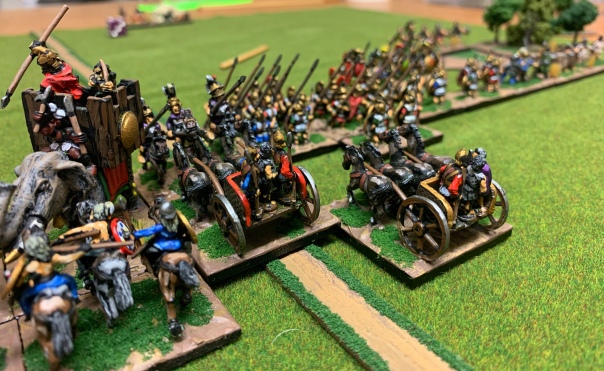
The first major battle occurred in early 277 BC near Agrigentum. Pyrrhus, his army reinforced and bolstered by Sicilian mercenaries, faced the Carthaginians on the coast. The Punic commander had selected an open battlefield ideal for heavy chariots and Punic foot. To counter the Carthaginian deployment Pyrrhus’ left rested on the coast and his infantry extended to the right. Again, Pyrrhus deployed towards the centre and between the phalanx. His right was extended by his massed elephants and cavalry interspersed by Sicilian auxilia.
The advance of both armies was swift and despite some attempts to adjust to the Epeirot deployment the Carthaginian chariots crashed into the Epeirot phalanx and pachyderms with unsurprising results. Meanwhile, other parts of the Epeirot phalanx, supported by Pyrrhus, pressed ever forward against the heavy Punic foot.
The fighting was desperate, as can be seen above, but the Carthaginian army was unable to withstand the Epeirot veterans. As night fell the Carthaginian army abandoned the field.
The ensuing months resulted in several great cities surrendering to Pyrrhus. However, as he advanced on Eryx, the last Carthaginian stronghold on the island in 276 BC, the Carthaginians having been reinforced offered open battle.
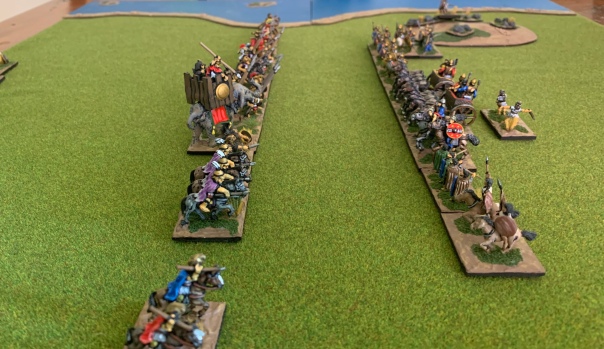
Again, the Punic army was deployed along the coast where it was supplied by the fleet and the terrain was open. The Carthaginian commander this time deployed more traditionally his mounted massed on the left and his heavy infantry extending to the right where a wood provided some protection from a move against the Punic right. Pyrrhus massed his mounted on his right opposite the Punic mounted and likewise extended his centre and left with his heavy infantry and the extreme left with his light troops. Again the armies advanced and soon both would be locked in combat. Punic light troops, originally to be used on the Punic right for an attack against the Epeirot left, were hastily moved to counter the Punic elephants but failed to adequately redeploy.
Above, the Epeirot army advances while the Carthaginian commander attempts to redeploy a number of slingers to his left. Below the advancing Epeirot phalanx, elephants and Pyrrhus heavy cavalry.
Instead, of the pachyderms being engaged with light troops it was the Gallic cavalry who skirmished against the Epeirot elephants while heavy chariots and Numidian light horse attempted to delay the advancing Greeks, as can be seen below.
But it was too much for the Punic host and the advancing phalangites, encouraged by Pyrrhus, pressed ever forward until the Punic army collapsed.
Thus ended our Epeirot adventures. Pyrrhic hopes of an Italian Kingdom looked initially likely to be achieved. That is until their devastating defeat at Fregellae in 278 BC. However, Pyrrhus’ campaign in Sicily was completely successful. With the Carthaginians utterly defeated there was nothing to prevent his establishment of a lasting kingdom on this rich island – other than a few rebellious locals and the rising power of his two new neighbours…

Lovely table and terrain.
Thanks Vince. The aesthetics are an important part of the game for me.
A fantastic report Keith. Your success with the Eporites has me considering them for my next army. I have the figures, Essex in this instance.
Cheers
Pleased you enjoyed it Greg and that it has provided some inspiration. I look forward to reading of progress. Perhaps they will face my Romans or Early Carthaginians at some point. Nothing like historical opponents…
Great report & lovely terrain & figures Keith. Really enjoy seeing one of your posts come up!
Thanks Greg. It is good to hear they are of interest.
Sounds like good fun, Keith! Did you give any advantages / handicaps to winners and losers?
Interesting question Aaron.
Over the years I have learnt that detailed campaigns don’t result in interesting battles. As with the Empire Camapign, which I will shortly be continuing, we just linked the battles without any changes to the standard DBA game. One can assume that casualties are recovered or made good by new recruits. After all Rome had significant manpower, which wouldn’t therefore pose problems. For Pyrrhus, growing casualties would trigger a strategic change.
It worked well.
Compte-rendu prenant comme d’habitude.
Merci, il semble que vous ayez apprécié que Google traduise correctement votre message.
Nice figures, nice report very interesting.
Thanks for the feedback.